
Load Pin Quick Start Guide Update
Strainsert provided the Load Pin Quick Start Guide in 2020 to assist engineers in setting up and installing our load pins in their applications. The overall process remains the same, but the guide image has been optimized and the steps defined by numbers (1-10) for further clarification.
Please contact Strainsert for assistance or any other questions on our load pin and load cell products.
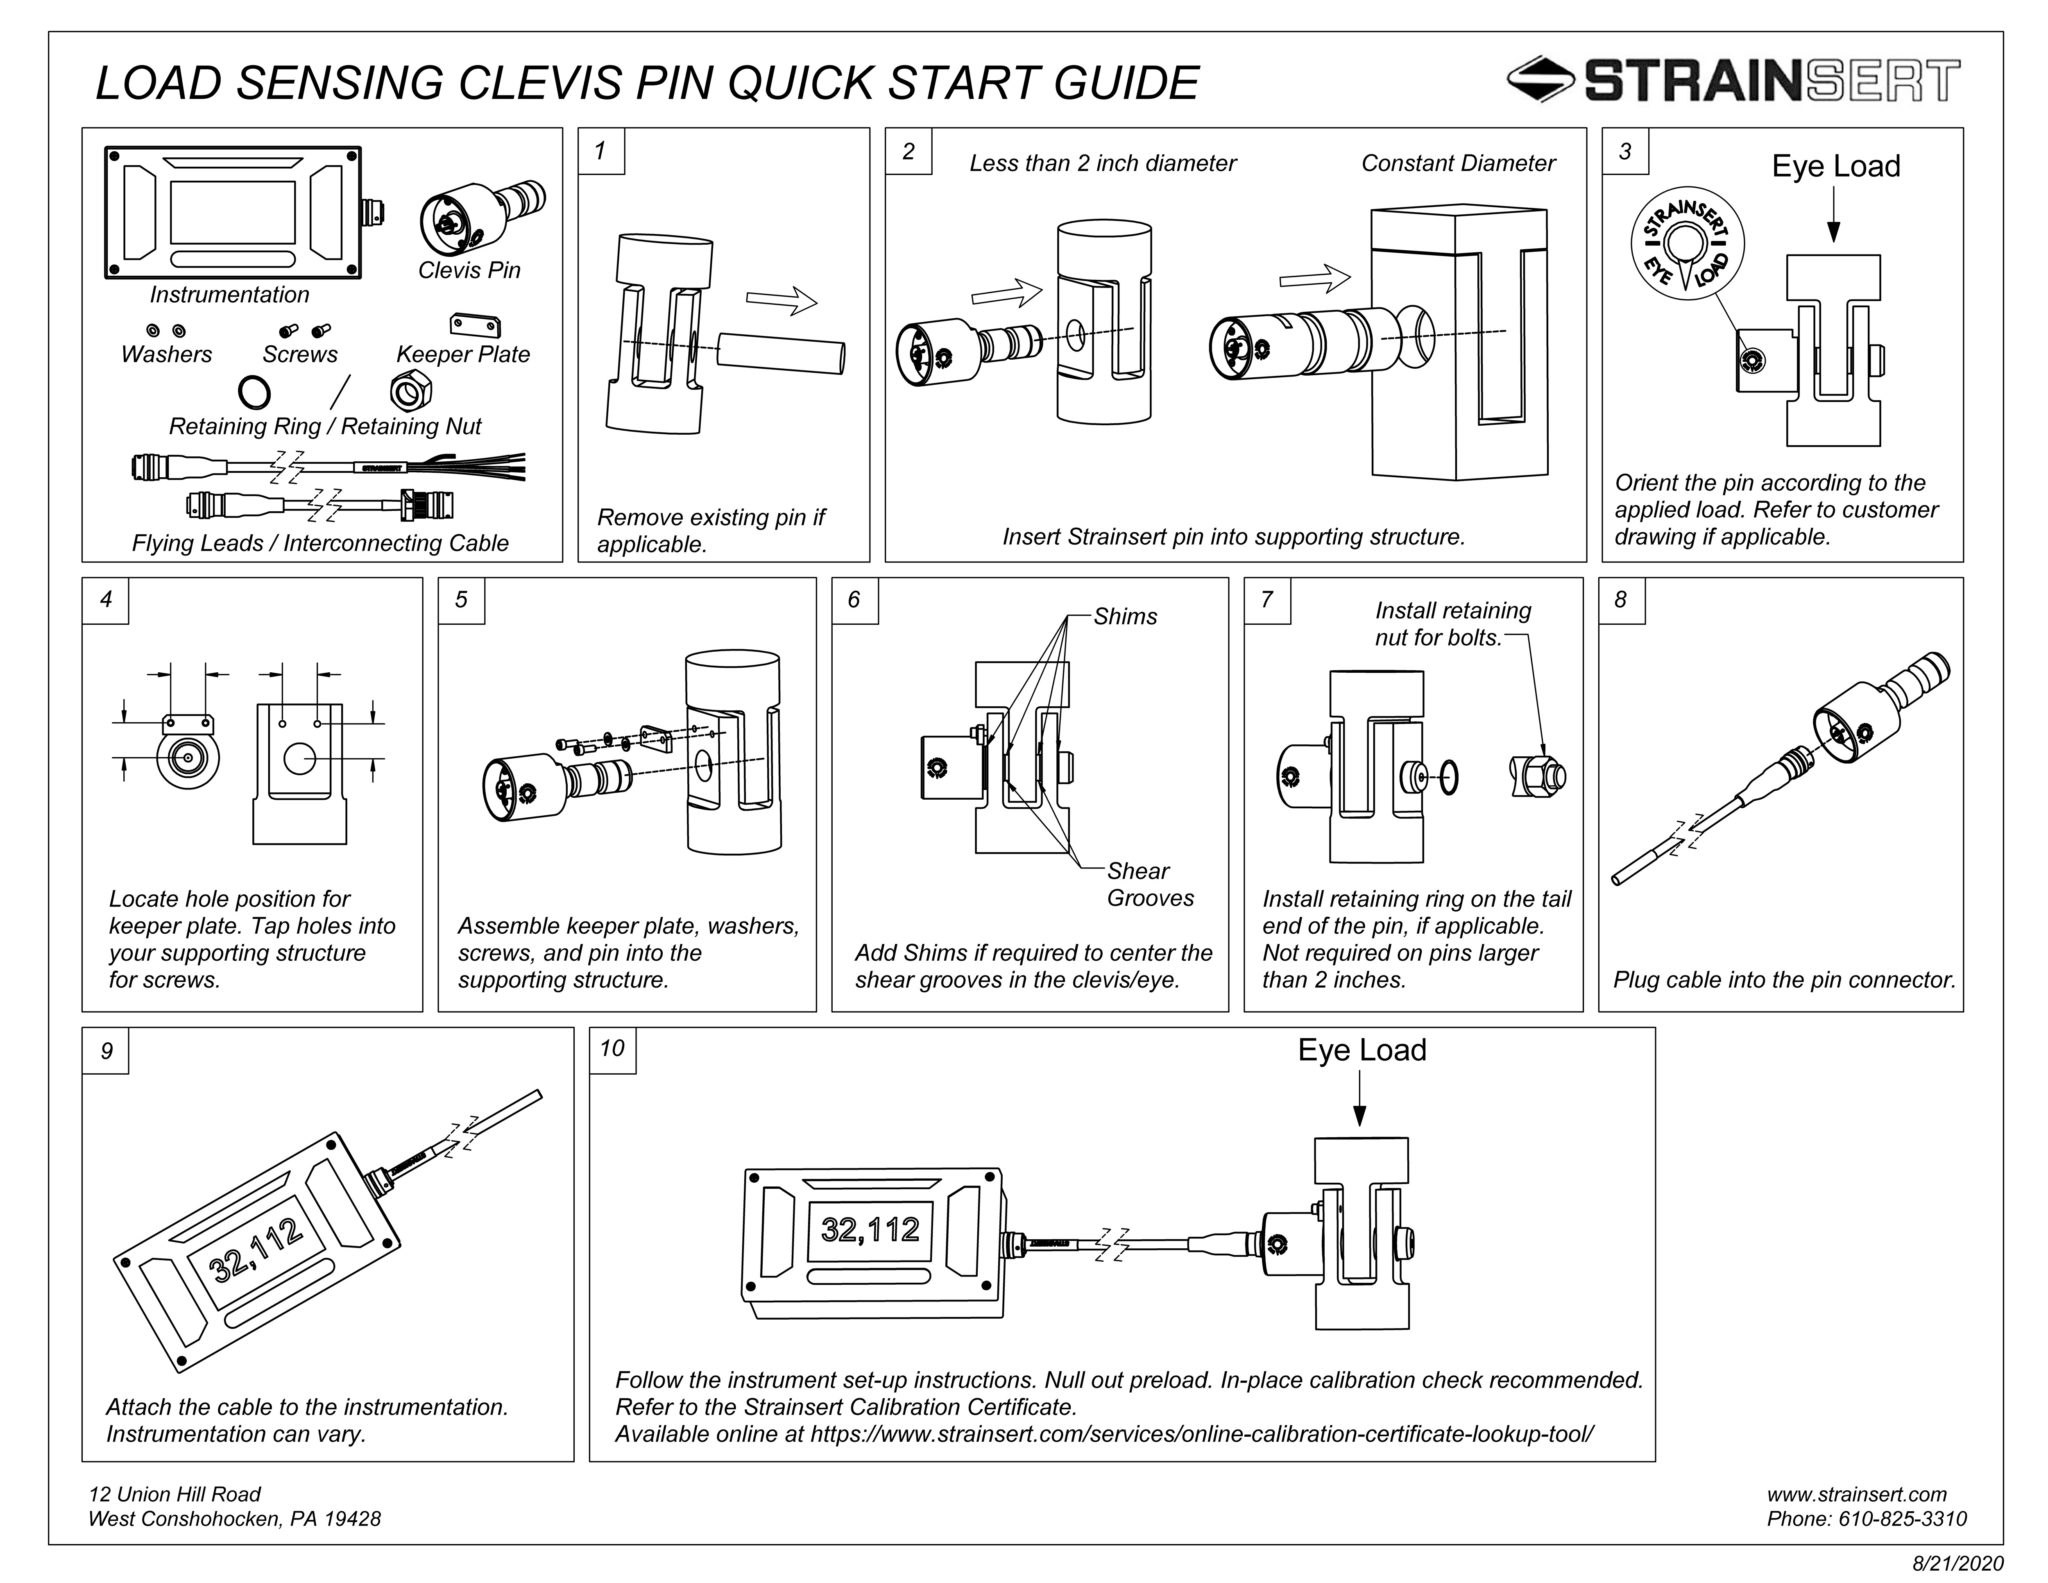
- Start with all the required items at hand:
- Load pin
- Instrumentation
- Flying leads or Interconnecting cable
- Keeper plate
- Washers
- Screws
- Retaining ring and nut
2. Remove any existing pin, if applicable to your situation
3. Insert the Strainsert Load Pin into the supporting device. See Guide for pins of constant diameter or less than 2 in diameter.
4. Orient the load pin according to the applied load. Please refer to your customer drawing, if applicable.
5. Locate the hole position for the keeper plate. Tap holes into your supporting structure for screws.
6. Assemble keeper plate, washers, screws and load pin into the supporting structure. Add shims if required to to center the shear grooves in the clevis/eye.
7. Install retaining ring on the tail end of the load pin, if applicable. *Not required on pins larger than 2 in in diameter.
8. Plug cable into the pin connector.
9. Attach the cable to the instrumentation. Instrumentation can vary.
10. Follow the instrument set up instructions. Null out pre-load. In-place calibration check is recommended.
Refer to the Strainsert Calibration Certificate available online: https://www.strainsert.com/services/online-calibration-certificate-lookup-tool/
Please contact Strainsert for assistance or any other questions on our load pin and load cell products.